Dynamic Range Compression
N.B.: This type of compression is completely different from the compression applied to files to make them smaller, more compact, such in the MP3 file format or in zipped archive files. Here, we are dealing with a method of processing the volume of the audio file.
Compressors & Limiters
Compressors
The purpose of a compressor is to reduce the dynamic range (the difference between the highs and lows) by reducing the volume level of those parts of the audio which exceed some threshold value. A good compressor lets you control both the threshold and the degree of reduction (referred to as the "compression ratio", with a higher ratio applying stronger compression). Below the threshold, the amplitude (ie, volume level) is not changed. But above it, the amplitude is reduced according to the ratio that's set.
Limiters
A limiter is a special type of compressor. The goal of a limiter is to prevent the amplitude from exceeding the threshold; it does this by having a very high compression ratio.
Examples of Applying a Compressor
Cool Edit 2000
A rather good tutorial of the application of concepts covered here is "Adobe Audition Tutorial for speech recordings", which also applies to Cool Edit: http://www.tagnet.org/aim/adobe-audition-tutorial.html
It is used by one LibriVox volunteer (the original author of this document) to post-processed his recordings with Cool Edit 2000.
What It Does
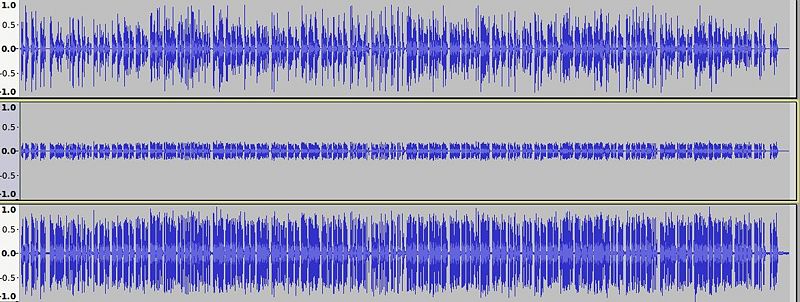
Dynamic Range Compression evens out the volume in an audio track by lowering the volume of the loud sections. Below is a comparison of a track after Amplification, and after Compression.
The first track is the original recording. The middle track is the same track after Compression. This particular compression was fairly strong. Once you amplify, the result is the one in the bottom track. As you can see, the waves are much more even. Compression makes your voice sound fuller, more powerful, as it brings out the softer parts.
Note: Because the track is amplified after Compression, some of the fainter background noises will be also amplified.
Audacity
Audacity website's Manual Entry
An alternative is the GComp plugin (Windows only).
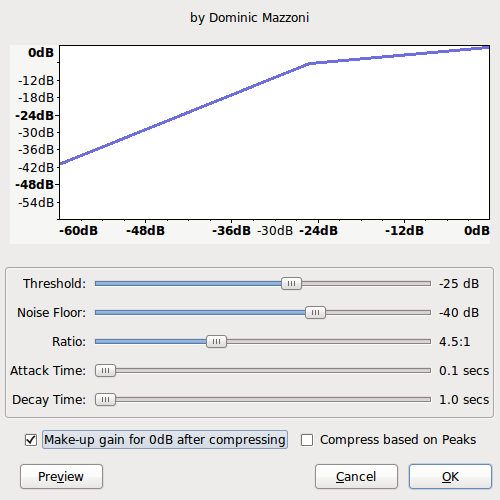
In the current release of Audacity (2.4.1), the Compressor has the following dialog box.
Threshold: volume above which compression is applied
Noise Floor: volume of the background/white noise
Ratio: ratio applied for compression
Attack Time & Decay Time: keep at lowest settings.
Make-up gain for 0dB after compressing: check if you want the Compressor to automatically amplify your track after Compressing. Not Recommended. Use the Amplify effect to adjust the volume.
Settings will depend on how your track looks after recording. In general, the Noise Floor remains the same, and you may have to play a bit with the Threshold and Ratio settings.
How to find out the Noise Floor? Select a section of silence, then do Effects > Amplify. Look at the value in the Amplification (dB) box. This is how much the silence needs to be amplified to be at 0, so your silence is 0-[the number]. Now select the threshold dB above your silence dB. Depending on your situation, you may want to select a Noise Floor much higher than the actual volume of your background noise.
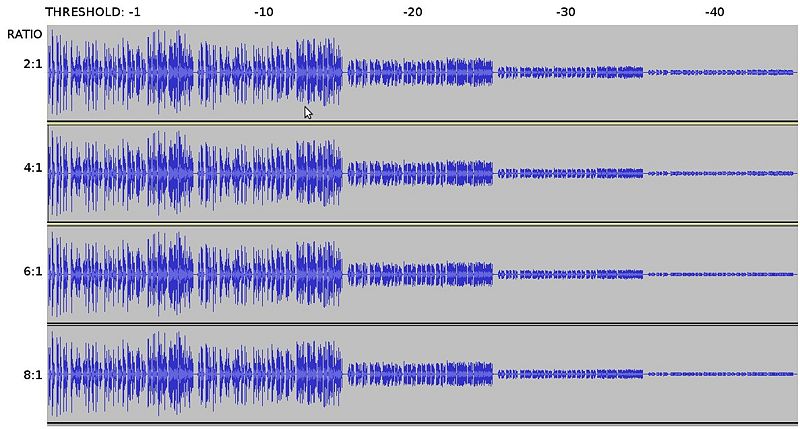
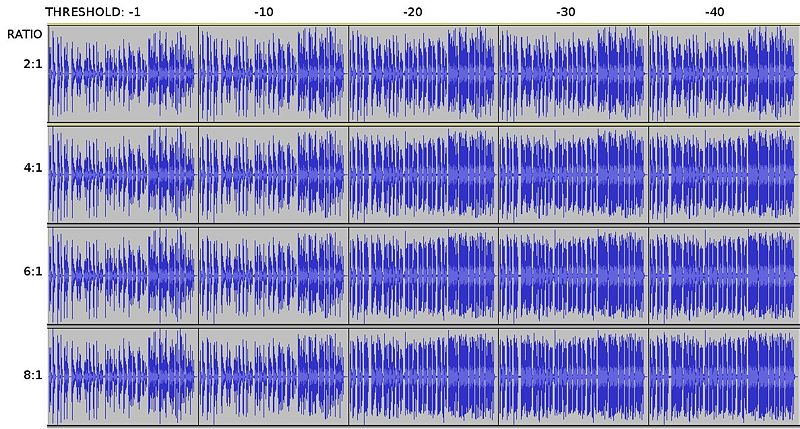
Rather than try to explain what effects Threshold and Noise Floor have, here is a chart for a better overview instead.


