Removing Peaks
This page will show you how to remove one or a few peaks that are much louder than the rest of the recording. Removing peaks will allow you to amplify your recording better. Indeed, when using the Effects > Amplify function, Audacity will automatically give you the largest value it can amplify by without clipping (cutting off the wave). If you have a peak, the maximum amplification will be much lower. Therefore, you should get rid of peaks. Also, most often than not, peaks are actually caused by undesirable noises, like tongue clicks, or air hitting the mic. Depending on the circumstances, you may choose to de-amplify the peak, or get rid of it altogether.
Some circumstances where you may get rid of it:
- if the peak is caused by a mouth/tongue click, AND said click is not indispendable to hear the sound correctly. (EG: if you say "clapping" and there is a click on the "k" sound at the beginning of the word, then getting rid of the click altogether will mess up the word.)
- if the peak is caused by air hitting the mic, and the resulting puff is not part of a word. (EG: if you say "puff" and the "ff" sound caused a peak, you can't get rid of the peak, or you'll lose the 'ff' sound.)
In other circumstances, it is better to just lower the volume of the peaks.
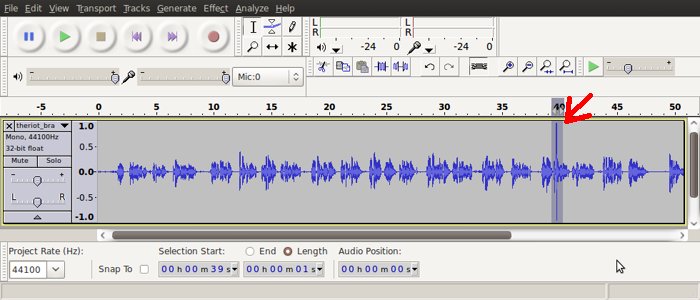
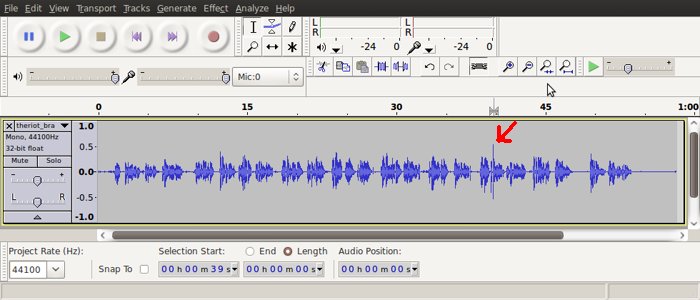
Here is an example of a peak. As you can see, it is one single vertical line at 0:40, much louder than the rest of the recording. This particular peak has been caused by a puff of air hitting the mic, which is a common occurrence. (To prevent this, avoid talking directly into the mic, but rather, to the side of it.)
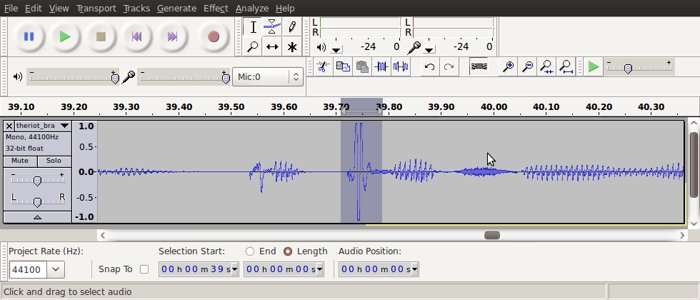
To remove peaks, first select the section, as shown above, and zoom in. You will see something like this:
As you see, the actual peak is still much smaller, so keep selecting the section where the actual peak is, as shown above.
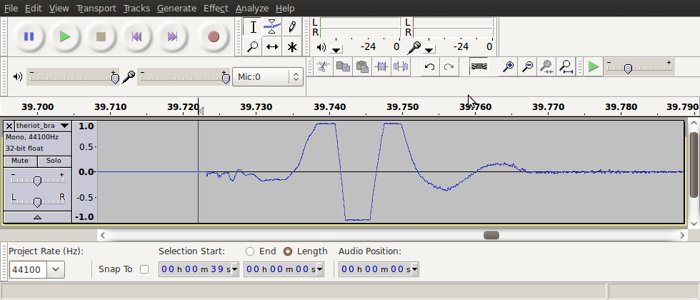
Zooming into the selection above shows you this:
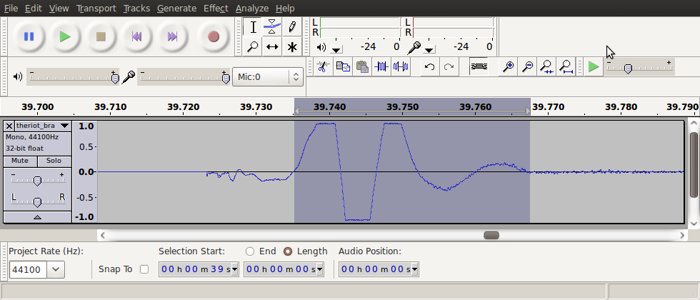
Now that we see the actual peak, we can select the section to de-amplify. The beginning of your selection should be right before the peak, at the spot where the blue wave crosses the 0 line. The end of the selection should also be at a 0-crossing, right after the peak. We have chosen the spot right before the wave goes flat, but you may elect to choose the 0-crossing at 39:760, or even the one before.
After selecting the peak, if you want to remove it, just hit the Delete key. If you want to lower its volume, go to Effects > Amplify. In the Amplification (dB) box, put -5, or another appropriate number, depending on how loud the rest of the recording is.
Selecting "-5" amplification will give you this:
In order to see how this compares to the rest of the recording, we have to zoom out. NOTE: Be careful NOT to click anywhere on the track, or you will risk de-selecting the peak. If this happens, you might have to go back and re-select your peak.
Zooming out, you see that the peak is still a bit too loud compared to the rest of the recording:
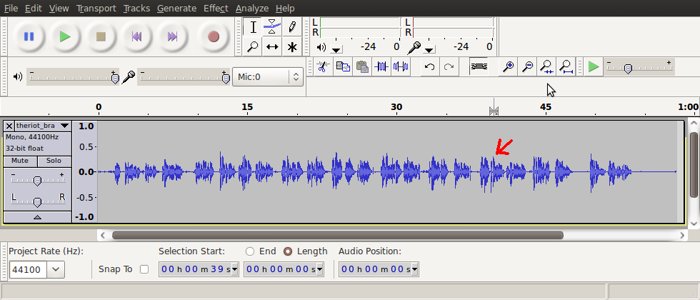
The peak should still be selected, so you can just do Effects > Amplify, and decrease it by a couple of dBs. The peak is now at the same level as the rest of the recording. Here is the final result:
