Amplifying
Here is a step-by-step guide on how to amplify using Audacity, with pictures, for your convenience.
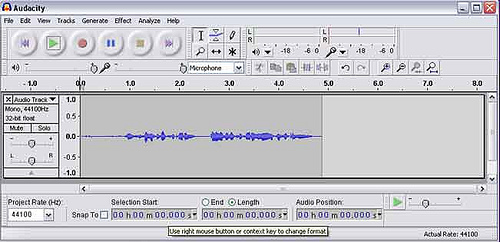
1. Original track

Your original track might look like this. If so, it might not be loud enough, and should be amplified.
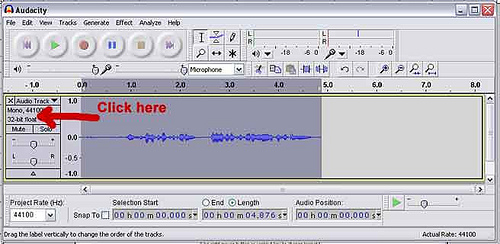
2. Select the track
To amplify, we first have to select the section. To select the entire track, a quick way is to click on the box at the left of the track. Or you can hold the <Control> key and hit the <A> key.

3. Amplify
Once the track is selected, you can amplify. To do this, you have 2 choices: Normalize, or Amplify. These are both versions of the same basic function. They both uniformly change the selection. For amplification, you pick how much the volume is increased. Some programs also allow negative values, so that lowers the volume, but, in either case, the same change is applied uniformly over the selected portion of the audio.
Normalization is a special type of amplification. The idea here is to uniformly alter the entire audio file such that the loudest peak in the file is at maximum volume (or else something slightly below that). That is, the entire file is amplified by the same amount to get the highest peak at maximum volume. (One can "normalize" a portion of a file, but that would be for some special effect.)
3.1 Normalize
Normalize is especially good if you have DC offset. DC offset is when the middle of the waves does not lie right on top of the 0 line, so using Normalize will shift it to the middle. DC offset may look like this:

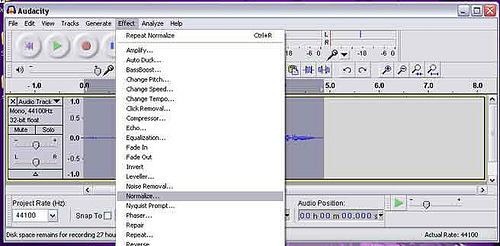
Normalize may be used whether you have DC offset or not. To Normalize your track, go to Effects > Normalize:

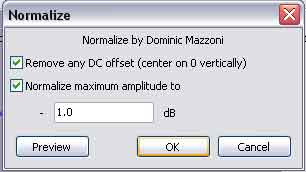
Then, just click OK. You don't need to change the settings.

It should give you a nice track that looks like this. Try to always keep the average volume around the 0.5 lines (shown in red):

Voilà! You have amplified your track. Now, you can see that there is a lot of background noise, which might benefit from some light noise-cleaning (see Noise Cleaning Tutorials).
3.2 Amplify
I usually use Amplify to increase the volume, more out of habit than anything else.
To Amplify, simply select your track (see point 2), and select Effects > Amplify.

You will get a dialog box. The value given is the maximum you can amplify before "clipping" occurs. "Clipping" is when the peaks of your waves get cut off at the top and bottom. Clicking OK will amplify the track. See that one of the peaks is at the very edge. This is OK, as long as nothing gets clipped. Any extra amplification will cause clipping. Audacity is smart enough to warn you when that happens: it will have the OK greyed out so you can't click on it unless you tick the "allow clipping" box.