Noisecleaning With Pics
- For the full Noise Cleaning tutorial, please visit the Noise Cleaning page.
Pour des explications en francais, voir la page Comment éliminer le bruit de fond.
Most of the time, a microphone will record background noise. Background noise can be anything from a slight buzz to an annoying high-pitched hiss. Cleaning up the background noise will highly improve the quality of your recordings.
How to Spot Background Noise
I always amplify before noisecleaning. I find it easier to spot noise. Background noise shows up as a fuzzy line. Things to keep in mind:
- Sometimes, when you're used to hearing the noise, it doesn't stand out that much to the ear.
- Depending on the frequency, the noise might even be pratically inaudible! However, if your silences show up as a bold or fuzzy line, there is noise!
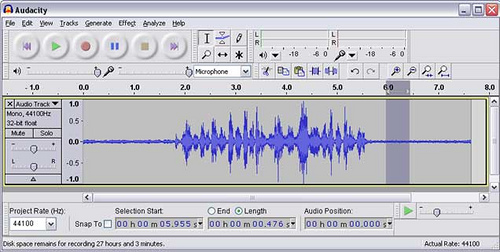
Here is what background noise looks like:

Clean up the Noise
1. Select a Noise Sample
Highlight a section of your recording that has pure background noise.

2. Define Your Selection as Noise
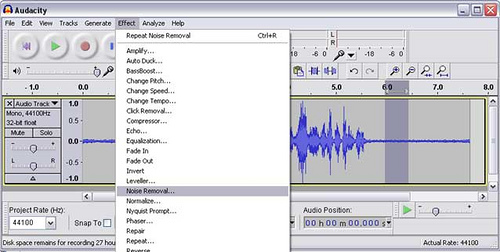
Tell Audacity this is the noise you want cleaned. Select Effect > Noise Removal

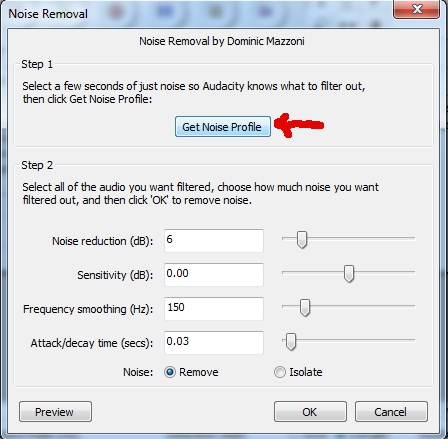
A dialog box pops up. Click on Get Noise Profile. The box will disappear.

3. Remove Noise
Select your entire track (Ctrl + A). Go back to Effect > Noise Removal. Now, tweak the settings.
- Set Attack/decay time to 0.01
- Set Frequency Smoothing to something around 250. (You might have to play with it a bit, though I haven't found it makes that much difference. Just don't crank it up all the way to the right.)
- Now, play with the first slider. Start at the left, click Preview (bottom left), and keep increasing the number until you can't hear any background noise. I find 10-15 DB is reasonable, but try avoid going above 20, as it might start distorting the sound. (However, sometimes, you might do quite aggressive noise cleaning and get surprisingly good results with Audacity 1.3) Once you find the right level, simply click OK.
- Wait for the program to run. It might take a few minutes if it's a long recording.
Here is the Result:
